
A wood drill bit that glides over the wood instead of biting, an oval hole, fibers torn at the surface: we all know that moment when drilling goes awry. The problem rarely comes from the drill itself. It’s the tip of the bit that has lost its original geometry, and no speed adjustment can compensate for a dull edge.
Before buying a new set of bits, you can give a second life to the ones you already own. However, it’s essential to understand what you’re sharpening and why the shape of the tip matters as much as the cutting edge.
Further reading : Tips and Tricks to Simplify Daily Life for Young Moms
Tip Geometry: What Determines the Precision of Wood Drilling
On a standard twist drill bit, the tip has two symmetrical cutting edges separated by a central ridge (the land). When drilling wood, it’s the symmetry between these two edges that determines whether the hole will be round or oval. Even a slight difference between the two sides is enough to misalign the drilling.
Recent bits often incorporate dedicated geometry tips for centering. Some HSS models adopt a cross sharpening that limits slipping at the start. Reproducing this precise angle by hand remains tricky, and this is where most sharpening errors occur.
Recommended read : Tips and Inspiration for Designing a Harmonious and Welcoming Garden
To master the wood drill sharpening techniques suited to each type of bit, it’s helpful to first identify the original shape of the tip before touching anything.
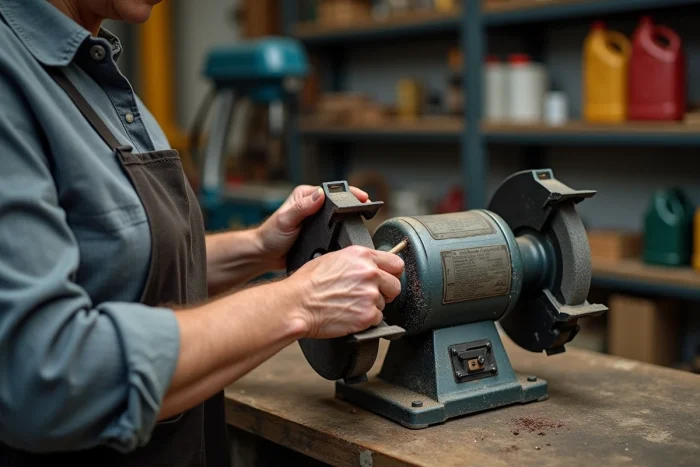
Sharpening a Wood Drill Bit on a Grinder: The Practical Method That Works
We often talk about grinders without specifying which one. For a high-speed steel wood drill bit, a medium-grit aluminum oxide (corundum) wheel is suitable in the vast majority of cases. Diamond wheels, which are more aggressive, are reserved for carbide bits.
Positioning the Bit Correctly
Hold the bit between your thumb and index finger, with the tip facing up towards the wheel, at a consistent attack angle. The movement goes from bottom to top, following the curvature of the cutting edge. Work on one edge, then the other, aiming to remove the same amount of material from both sides.
The classic trap: pressing too hard or staying too long in one spot. Overheating turns the steel blue and causes it to lose its hardness. Cool the bit in a container of cold water every few seconds.
Check the Symmetry After Each Pass
A visual check is not always sufficient. You can use a simple technique: lay the bit flat on a light surface and observe the shadow cast by the two edges. If they are not identical, correct the longer edge.
- Check that both edges are the same length using a ruler or caliper placed against the tip
- Check the relief angle behind each edge (the material should gradually recede from the cutting edge; otherwise, the bit will drag instead of cut)
- Perform a test drill in a piece of soft wood to confirm that the chips are coming out evenly from both flutes
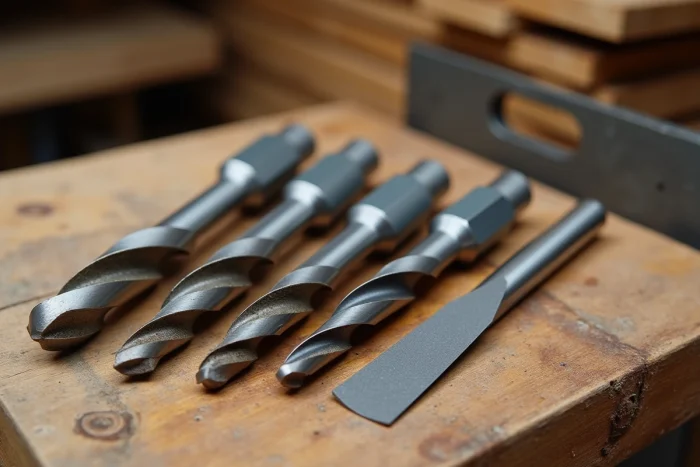
Specific Wood Bits: Adapting the Sharpening to the Type of Bit
A twist drill bit is not sharpened like a flat bit or an Irwin-type double-helix wood bit. Each geometry requires a different tool and technique.
Flat Bits (Spade Bits)
These wide bits are sharpened with a fine flat file. Only the upper face of the two cutting edges is worked on, maintaining the original angle. Never file the underside, as this would alter the cutting height and create excessive play in the hole.
Twist Bits with Centering Screw
The central screw (the screw tip) guides the bit into the wood. If it is dull, the bit will refuse to advance. Touch up the side cutters with a three-square file (small triangular file) working from the inside out. Do not touch the screw itself unless the threads are crushed.
End Mills and Self-Centering Bits
Recent “anti-slip” designed bits are factory calibrated with specific angles and spirals. Manual resharpening can degrade the original performance if the exact angle is not respected. Feedback varies on this point, but when the bit has lost its centering geometry, replacement is often more reliable than retouching.
Routine Maintenance of Wood Bits in the Workshop
Sharpening does not compensate for poor daily maintenance. A few habits can extend the lifespan of bits and space out trips to the grinder.
- Store bits in a holder or individual case to prevent the tips from knocking against each other in a drawer
- Clean the flutes after each drilling session (resin from softwoods hardens and prevents chip removal)
- Adjust the rotation speed to the diameter of the bit: the larger the diameter, the lower the speed should be
- Remove the bit regularly from the hole during drilling to clear the chips, especially in dense woods
A clean and properly stored bit retains its sharpness much longer than a bit left loose in a toolbox.
The best indicator remains the chip itself. A sharpened bit produces consistent, curly chips. As soon as you start getting fine dust or torn fibers, it’s a sign that you need to go back to the grinder or change the bit. Keeping this observation reflex helps avoid failed drillings and preserves both the bit and the piece of wood.